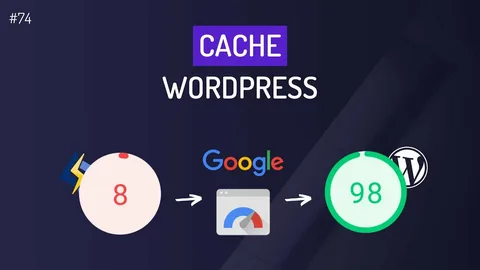
If you’ve ever updated your WordPress site only to find that the changes don’t appear right away—or if your site feels slow or unresponsive—there’s a good chance caching is involved. Caching is a powerful performance feature, but when outdated cache files pile up, they can cause issues that confuse both site owners and visitors. Learning how to clear your WordPress cache is an essential skill for maintaining a fast, smooth, and reliable website.
This guide explains what WordPress caching is, why it can sometimes cause problems, and how to clear it across plugins, browsers, hosting platforms, and content delivery networks.
What Is Caching and Why Does It Matter?
Caching is a process that stores copies of your website’s static files—such as images, CSS, JavaScript, and even entire HTML pages—to speed up load times for visitors. Instead of generating content every time someone loads a page, WordPress can deliver a quick, pre-saved version from the cache.
This is incredibly helpful for performance. In fact, studies show that even a one-second delay in page load time can reduce conversions by up to 7%, highlighting just how important caching is for user experience and business results.
However, this convenience can backfire when cached versions become outdated. That’s when clearing the cache becomes necessary.
Why You Should Clear Your WordPress Cache
You might wonder: if caching improves speed, why would you ever clear it? There are several important reasons:
1. To Display Recent Website Changes
If you update page layouts, menus, posts, images, or CSS styles and don’t see the changes appear, the cache is likely showing an old version of the page. Clearing it refreshes the stored files so new content appears instantly.
2. To Fix Functionality Issues
Sometimes cached JavaScript or styling files conflict with updates you make to your theme or plugins. This can break your site’s layout, create odd behaviors, or cause certain features to stop working—clearing the cache resolves these glitches.
3. To Improve Site Speed
Ironically, too much cached data or outdated caching rules can slow your site down. Resetting the cache helps remove unnecessary files and allows your caching system to rebuild optimized versions.
4. To Ensure Visitors See Accurate Content
Your audience should always see your newest blog posts, promotions, prices, or design updates. Clearing the cache ensures visitors never see outdated content by mistake.
5. To Troubleshoot Errors
When debugging issues, cached files can make it look like problems still exist even after you fix them. Clearing cache helps you see the true, current state of your website.
How to Clear the WordPress Cache (Step-by-Step)
Clearing your WordPress cache depends on what caching tools you use. Most sites use one or more of the following:
- A caching plugin
- Browser cache
- WordPress hosting cache
- CDN (Content Delivery Network) cache
Below is a detailed guide for each method.
1. Clear Cache Using WordPress Caching Plugins
Most WordPress websites rely on caching plugins to improve speed. These plugins make it simple to clear cache with one click.
WP Super Cache
- Go to Settings > WP Super Cache
- Click the Delete Cache button
- The plugin instantly removes all stored cache files
W3 Total Cache
- Navigate to Performance > Dashboard
- Click empty all caches at the top
- The plugin clears page, database, and object caches
WP Rocket
- Go to Settings > WP Rocket
- Select Clear Cache from the dashboard
- You can also clear cache for individual pages by editing a page and clicking the Clear cache for this page option
LiteSpeed Cache
- Visit LiteSpeed Cache > Toolbox
- Choose Purge All
- This resets all cached files generated by LiteSpeed
2. Clear Your Browser Cache
Even after clearing WordPress cache, your browser might still hold old copies of files. This can create the illusion that your site isn’t updating.
To clear browser cache (example for Chrome):
- Go to Settings
- Open Privacy and Security
- Select Clear browsing data
- Check Cached images and files
- Click Clear data
This ensures your browser loads the latest version directly from the server.
3. Clear Hosting-Level Cache
Many premium and managed WordPress hosting companies provide built-in caching at the server level. This can override plugin caching, so it’s important to clear this too.
SiteGround
- Go to Site Tools > Speed > Caching
- Select Dynamic Cache
- Click the Purge icon
Bluehost
- Visit Bluehost Portal > My Sites
- Select your site
- Click Settings, then Performance
- Hit the Purge Cache button
WP Engine
- Log into your dashboard
- Choose the site environment
- Click Purge All Caches
Hosting-level caching is extremely powerful and can often be the primary cause of stubborn caching issues, so it’s always worth checking.
4. Clear CDN Cache (Cloudflare, etc.)
If you use a CDN, it stores cached copies of your website on servers around the world. Clearing CDN cache ensures those global copies update correctly.
Cloudflare
- Log in to Cloudflare
- Select your domain
- Go to Caching
- Click Purge Everything
Be aware that this will briefly slow your site down as Cloudflare rebuilds new cached versions.
Other CDNs
Most CDNs (StackPath, KeyCDN, Akamai) offer similar “Purge” or “Clear Cache” options in their dashboards.
How Often Should You Clear Cache?
You don’t need to clear your cache every day. In most cases, WordPress handles caching efficiently on its own. But you should clear it whenever:
- You update your theme or plugins
- You publish design or layout changes
- You fix bugs or perform troubleshooting
- Your site behaves strangely or loads incorrect content
- Your speed test results show outdated data
Most caching plugins also allow automatic cache expiration—typically every few hours or days.
Best Practices for Managing WordPress Cache
To avoid cache-related headaches, follow these simple best practices:
1. Use Only One Caching Plugin
Multiple caching plugins can conflict and slow down your site.
2. Set Cache Expiry Times
This ensures your cache stays fresh without manual clearing.
3. Enable Browser Caching
This improves speed for return visitors.
4. Use a CDN for Better Global Performance
CDNs lighten your server load and improve delivery time.
5. Test Changes in Incognito Mode
This lets you view your site without cached browser files.
6. Monitor Performance Regularly
Tools like Google PageSpeed Insights or GTmetrix help track caching effectiveness.
Final Thoughts
Clearing your WordPress cache is one of the simplest yet most impactful things you can do to keep your website running smoothly. Whether you’re updating designs, troubleshooting errors, or optimizing for speed, resetting your cache ensures your visitors always see the freshest, most accurate version of your site.
Caching is essential for performance, but like any system, it needs regular maintenance. By understanding how it works and knowing how to clear it across plugins, browsers, hosting platforms, and CDNs, you’ll have better control over your website’s speed, reliability, and user experience.


