In this article, we will learn to create WordPress hosting package for WHM. This article will be useful for the ones utilizing reseller hosting plans.
Let’s first have a look at what WHM is.
What is WHM (Web Host Manager)?
This is an administrative control tool that enables the user to handle the back end of numerous cPanel accounts. You can manage individual accounts and establish server-side restrictions using WHM.
It is a potent tool that grants access to the cPanel back end. WHM is provided for reseller accounts. Root WHM (also known as rWHM) provides functions that require root access to the server. It is installed on dedicated servers and VPS accounts.
What WHM Can Do?
- You can access or modify anything that does not require SQL access by switching between each cPanel on your account.
- Change the domain names and user identities for your clients.
- cPanel’s flexibility lets you customize how your own customers’ support inquiries are handled.
- Possibility of setting up your default page when creating a new account.
- Access to fully brand your hosting environment and control panel.
- You can make, remove, and suspend cPanel accounts.
- Manage and keep an eye on your websites (password resets).
- Access to verify and modify the DNS zones for each of your domains.
Difference Between WHM And cPanel
Let’s have a look at how WHM is different from cPanel.
WHM:
- Execute essential control panel maintenance.
- Make unique accounts.
- Configure the private server, change DNS zone records for each domain and subdomain, and access resold accounts without providing login information.
- Make personalized hosting plans.
- Modify cPanel account resource restrictions.
- cPanel account password resets and email addresses to contact.
- Manage the features of hosting plans and accounts and add domains.
cPanel:
- Install CMS, manage files, and post content to websites.
- Modify DNS records for their domains, add/remove addon domains and subdomains, create email accounts, control email settings, and SPAM protection.
- Tracking website statistics, managing backups, databases, and so forth
Related Articles: https://tezhost.com/category/cpanel-hosting/
Let’s get started without further ado!
Create WordPress Hosting Package in WHM
The steps to create a WordPress hosting package in WHM are outlined below:
1. Log in to your WHM account
This is the very first requirement for creating a package.

2. New Package
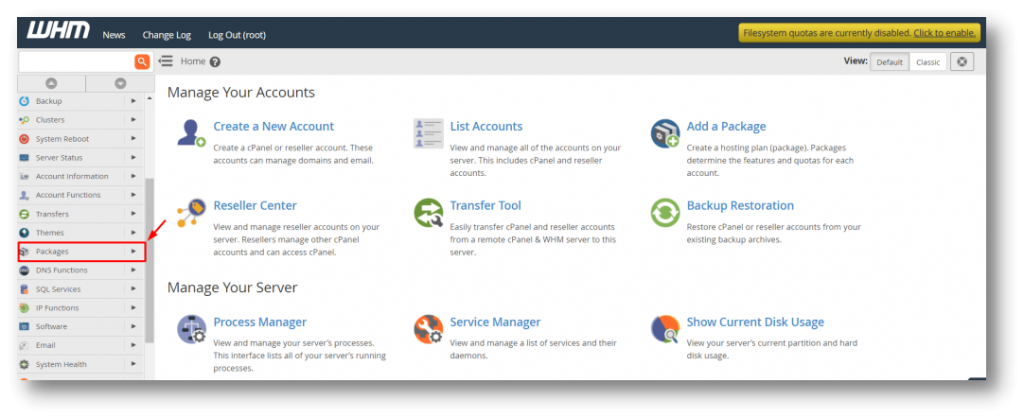
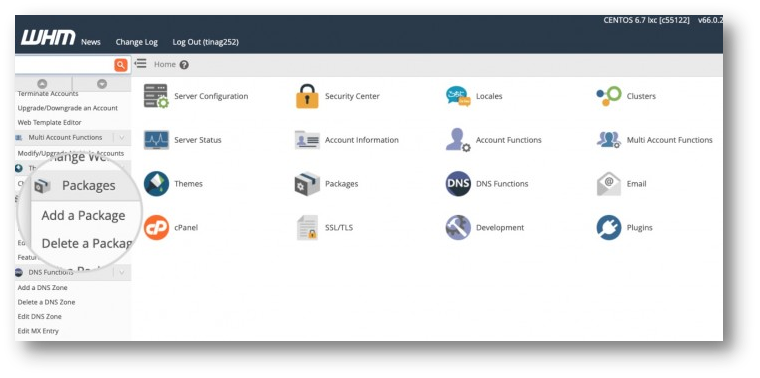
Now, click “Packages” on the left navigation menu bar.

3. Adding Package
Under the packages section, click on “Add a Package”

4. Filling The Package Form
After clicking the add a package, a package name and resources form will appear. You have to fill it. Fill in all the package info carefully.

5. Setting Section
Under the setting section, permit the admin to add or deny the Dedicated IP, Shell Access, CGI Access, and Digest Authentication at account creation.
After setting all, click on the “Add” option.

You are all set now!
Now that the new account package has been produced, it is possible to create hosting accounts more quickly. Then select the Packages link. Now from here, you can also Edit Packages after that.
Reseller Articles: https://tezhost.com/category/reseller-hosting/
For more such guides head on to our blogs section!


